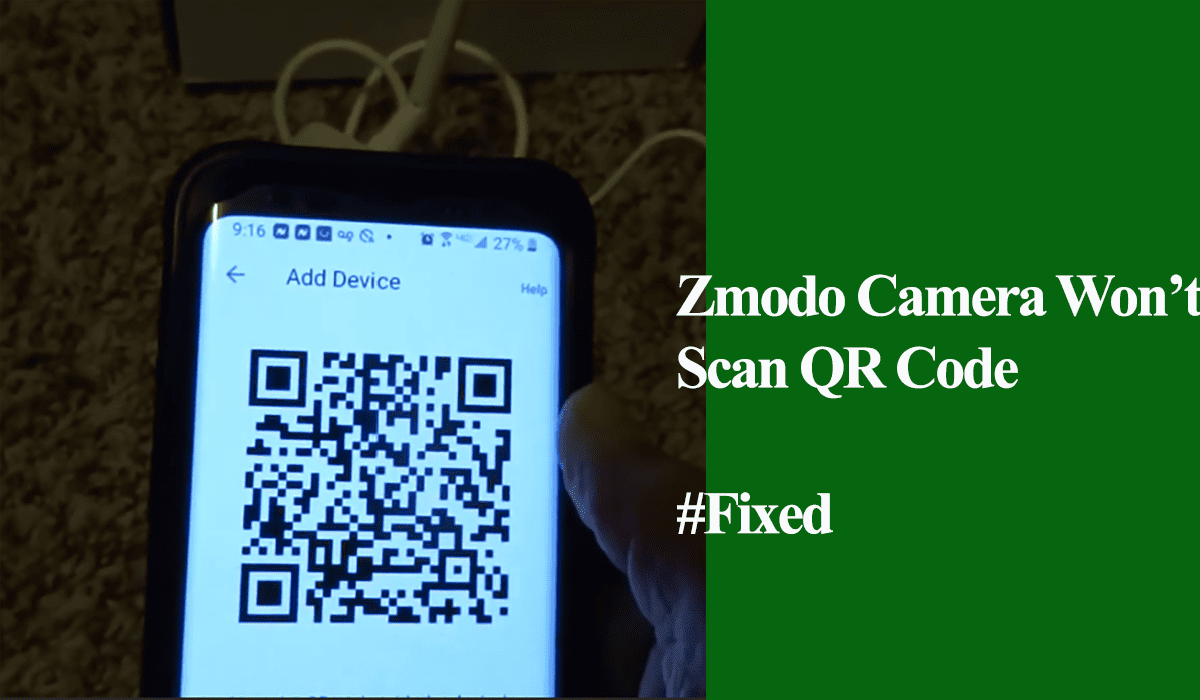
Scanning the QR code during the setup allows the camera to receive Wi-Fi credentials and authenticate. However, sometimes the Zmodo camera won’t scan the QR code, thus, through the setup process into oblivion.
The QR code scanning phase is a crucial step in the camera setup process as it lets the camera receive the necessary Wi-Fi login details from the app. Without a successful scan, the camera cannot authenticate and connect to your network.
Let’s explore some common reasons why your Zmodo camera may not scan the QR code;
- Scanning from an incorrect angle or distance
- Corrupt firmware files
- Mobile device screen severely cracked
- Excessive screen glare during QR code scanning
- Camera lens issues – not removing the lens cover, dirt or smudged
- Screen size too small for accurate scanning by the camera
- Mobile device screen being either too dark or too bright
- Incorrect timing, such as the camera not being in pairing mode or taking too long
- Device malfunctioning or defective
When scanning the QR code, ensure that you have removed the lens cover and are scanning correctly. Depending on your device size, Zmodo recommends scanning the QR code from 8 – 12 inches away.
Zmodo Camera Won’t Scan QR Code – Troubleshooting
Without scanning the QR code, you won’t successfully hook the camera to your 2.4 GHz Wi-Fi network via the QR scanning method via the app.
Try these solutions to get your camera to scan the QR code;
Clean The Camera Lens and Mobile Device Screen
To ensure optimal scanning conditions, use a soft microfiber cloth to clean both the camera lens and the screen of your mobile device. Removing any dirt, fingerprints, or smudges will enhance the clarity of the QR code.
Again, if you haven’t removed the lens cover, please do so to ensure effective scanning.
Correct Scanning Technique
Before scanning, ensure your Zmodo camera is in pairing mode – with a flashing green LED light. If not, perform a camera reset to enter the setup mode.
To correctly scan the QR code;
- Maintain a 6-8 inches distance between your mobile device and the camera.
- Remove any protective film covering the camera lens.
- Point the QR code towards the camera lens for 5-10 seconds, adjusting the distance and angle if necessary. Listen for the confirmation beep indicating successful scanning
Alternatively, use the camera to scan the QR code with your mobile device remaining stationary.
Disable Dark Mode and Blue Light Filtering
Dark mode and blue light filters on your mobile device can interfere with the lighting conditions required for successful QR code scanning.
Turn off these settings before attempting to scan the QR code again.
Scan the QR Code on A Larger Device
If your mobile device screen size is too small or heavily cracked, consider using a larger screen, such as a laptop or TV, to scan the QR code.
Capture a screenshot of the QR code on your mobile device, transfer it to the larger screen, and proceed with the setup process, ensuring the camera scans the QR code from the captured screenshot.
Remember, you must carry out these activities while the camera is still in pairing mode.
Reset The Camera and Reconnect
Resetting the camera can help resolve connectivity issues by restoring it to its factory settings.
To reset a Zmodo camera, press and hold the reset button on a powered camera for 10 -55 seconds. The camera will start the resetting process.
After the reset, the camera will enter pairing mode – with a flashing green LED light, ready to establish a new connection.
Reconnect the camera via the Zmodo app and try accessing the live stream. The camera’s status LED turns solid BLUE after successfully connecting to your network.
If nothing works, try setting up the camera via an alternative method. As illustrated below;
Setup Zmodo Camera Without QR Code
When your camera doesn’t connect via the standard setup technique, you can explore other setup options on the Zmodo app.
The Zmodo app offers four setup methods to add a camera device to your system. Trying a different approach could connect your camera to your Wi-Fi network.
Here are the setup methods;
- Zink – connect to the camera’s hotspot (ZMD_SAP) network before entering your Wi-Fi details. This helps confirm that your camera is in setup mode. Turn off your mobile data and VPN while using this method. The best and most straightforward alternative.
- Smart Home – Has three options, and the app walks you through the entire process.
- Legacy – Follow in-app prompts for compatible devices
If you are experiencing trouble with the QR scanning, try the Zink setup procedure, as it’s the most straightforward alternative.
Alternatively, you can connect the camera directly to your network from a PC browser.
- Put the camera in pairing mode
- Connect your PC to the ZMD_SAP network
- Type in your camera’s local IP address and port number on a web browser (192.168.10.1:8087)
- Feed in your 2.4 GHz Wi-Fi network on the pop-up window (SSID, PASSWORD, USERID, AND CLIENT COUNT). You can use “admin” and a number value to fill the last two fields. Tap Ok.
- You should get a success window meaning the camera has received your network credentials.
Observe the camera status LED. Once it turns solid blue, it has connected to your network. Refresh the app and try finding it.
Final Thoughts
Scanning the QR code is a crucial step in the initial setup process. Without it, the camera won’t receive network credentials for authentication. It’s a frustrating encounter as it leaves you stuck with a bunch of useless devices.
Luckily, there are solutions you can employ to circumnavigate the issue and get your cameras hooked. Try to clean the camera lens and mobile device screen, ensure proper scanning technique, turn off dark mode and blue light filtering, consider using a larger device for scanning, or switch the Setup Mode.
It points to a faulty device scenario if you can’t find the ZMD_SAP network under your available networks with the camera in setup mode.